In this blog post we are going to give you some insights on how we implemented email automations using Splitbee Automations.
Why even bother creating onboarding mails?
They help you engage your new customers, before they get lost or forget about your service. It helps them to get to know your platform or reactivate them in case they missed something you want them to do.
One example we currently have in place for Splitbee
If a user signs up, we want them to create a project and actually embed the project Splitbee to their page. We want to reactivate users that did create a project but did not embed the script within 24 hours. In that way we can try to get them on board or ask them why they didn't implement it (yet).
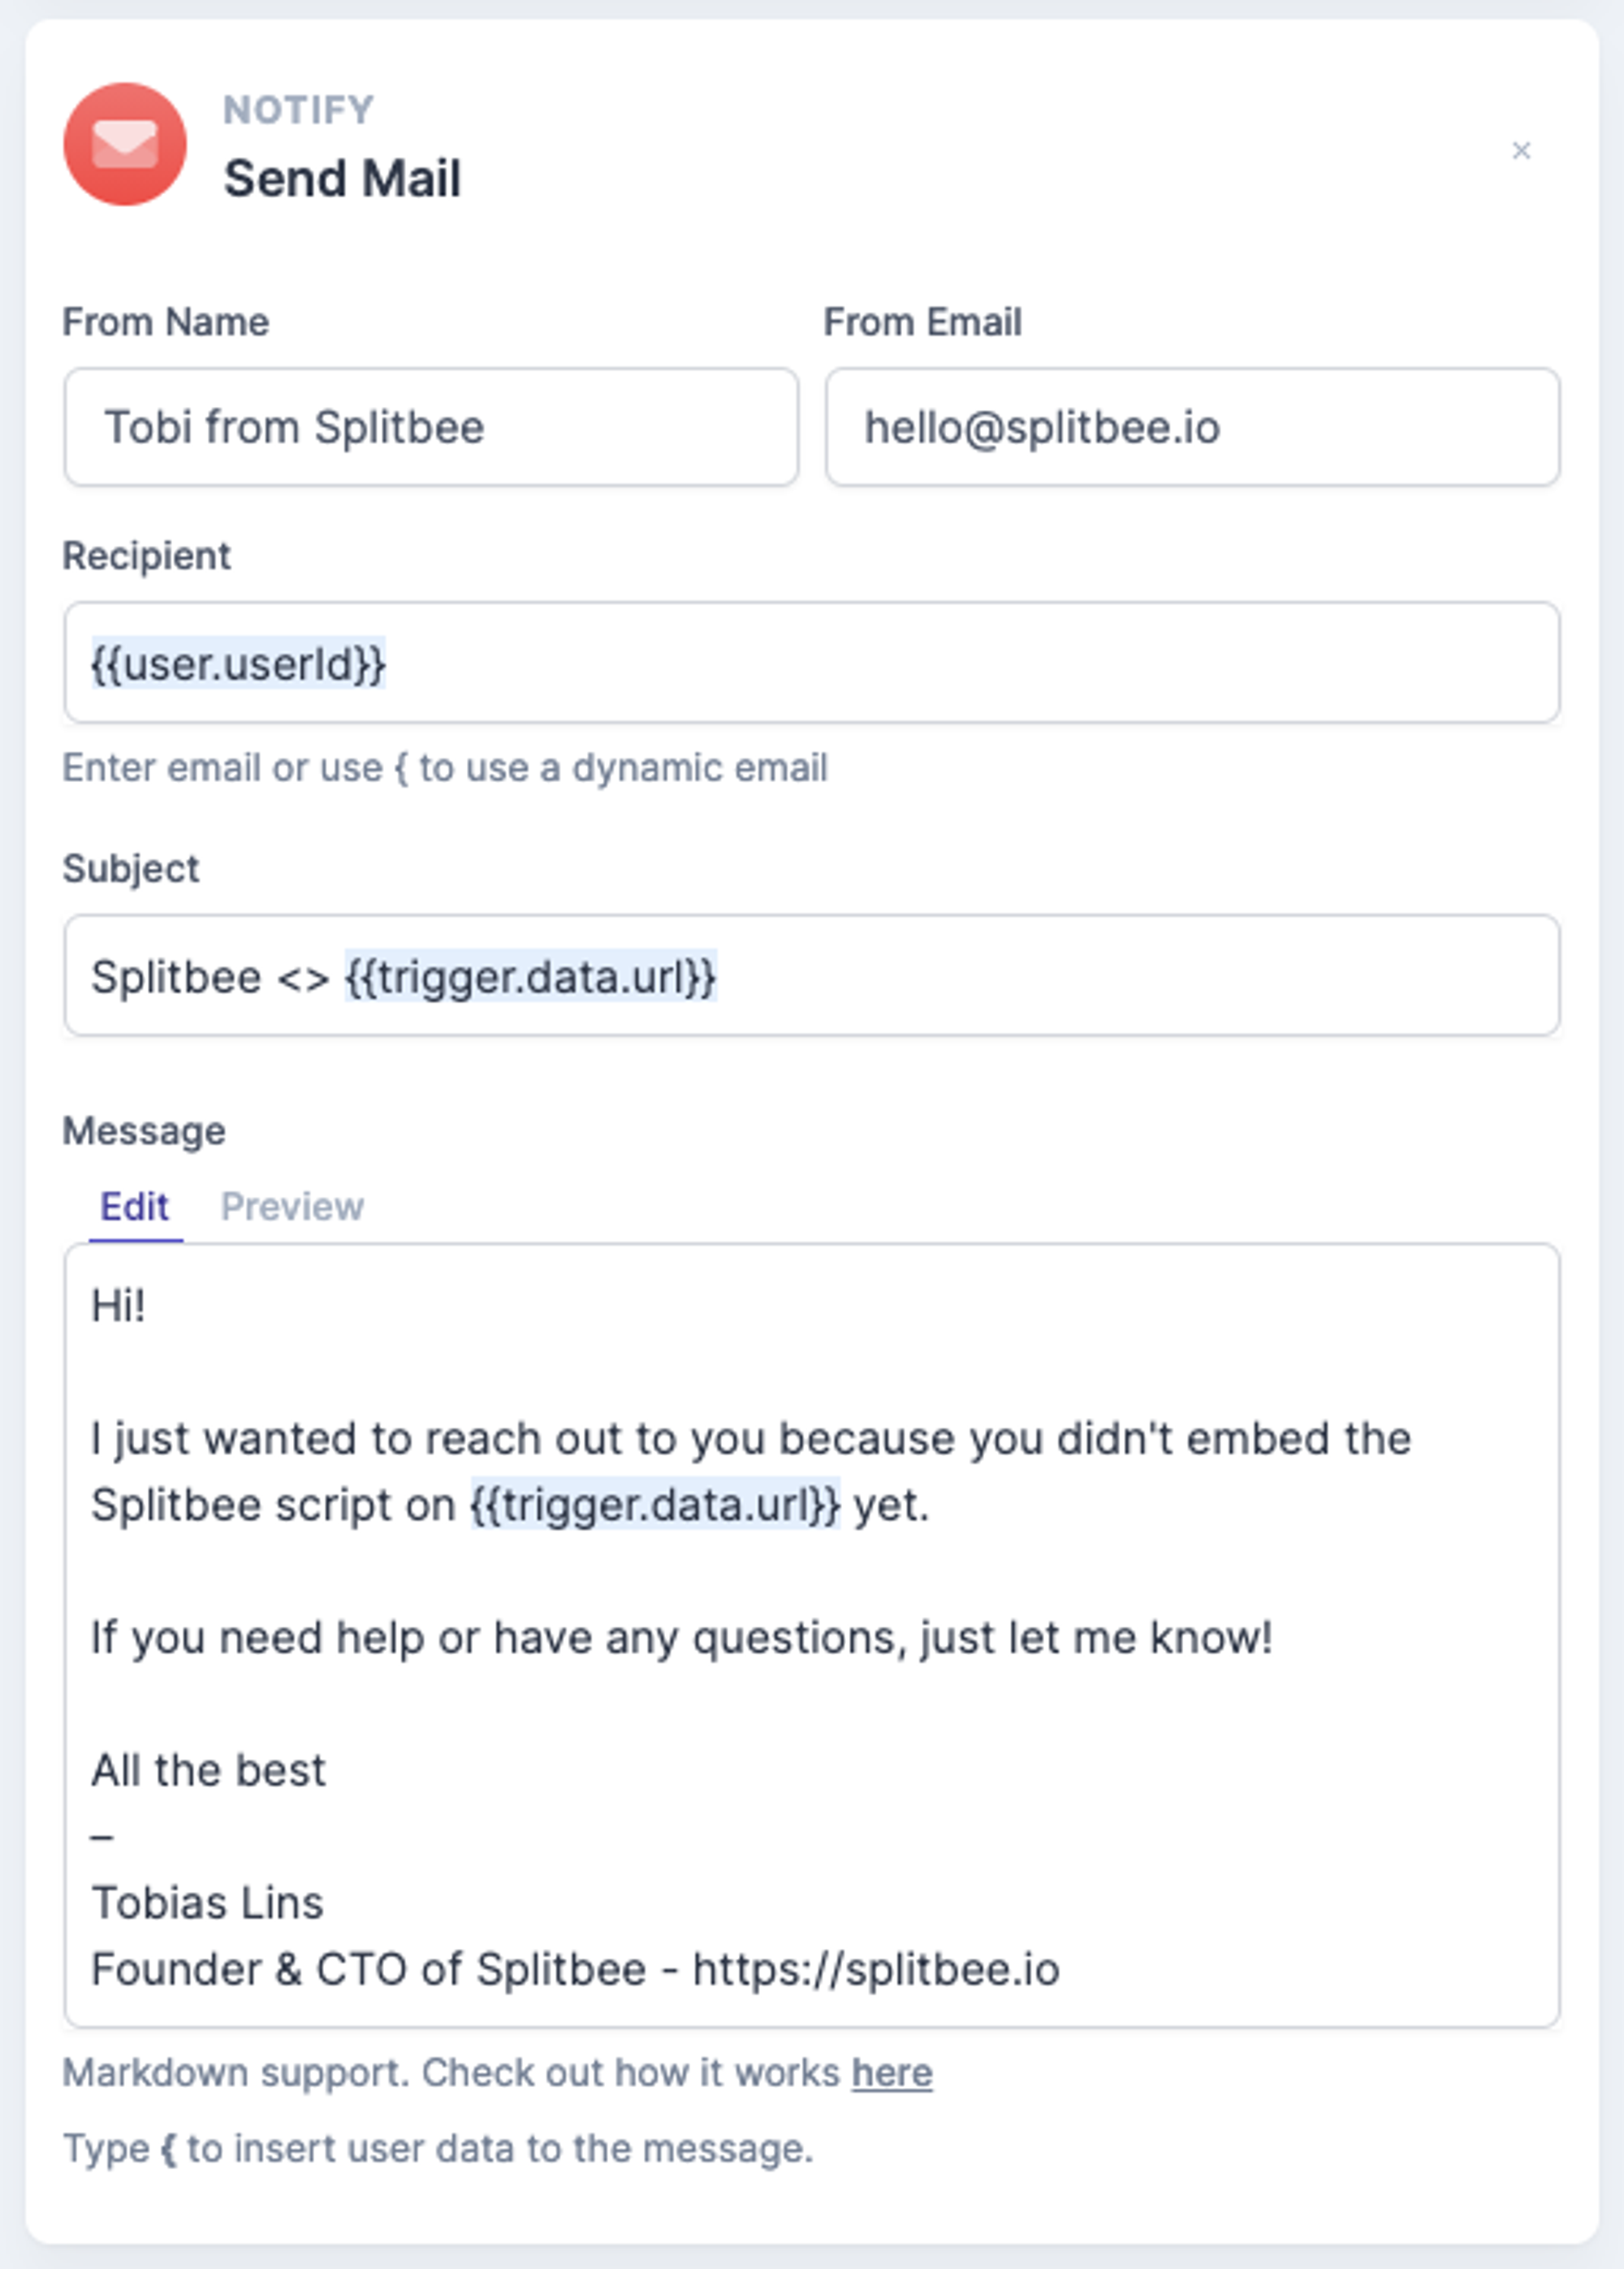
The email looks like this:
Hi! I just wanted to reach out to you because you didn't embed the Splitbee script on yourdomain.com yet. If you need help or have any questions, just let me know! All the best – Tobias Lins CEO of Splitbee - https://splitbee.io
Wondering how we implemented this? We used Splitbee automations to achieve this and you can use it too!
Building an Automation
Each automation starts with a trigger that can be either a Page View or an Custom Event.
In the example from above, we are going to use the custom event Create Project Success

Next we need to define an action that should be triggered after an event.
Now it's time to define our first mail. You can define the email sender name & email.
The recipient & subject can have dynamic variables from the user or event data. This can be used to send the email to the user that triggered the action.
{{trigger.data.url}} is the URL of the website. It's extracted from the custom data that is sent with the Create Project Success event.
Last, you need to define the email content. Our editor supports Markdown for formatting and templating.
Make sure to check out the Automation documentation as well.

Delay the action and cancel when condition already met
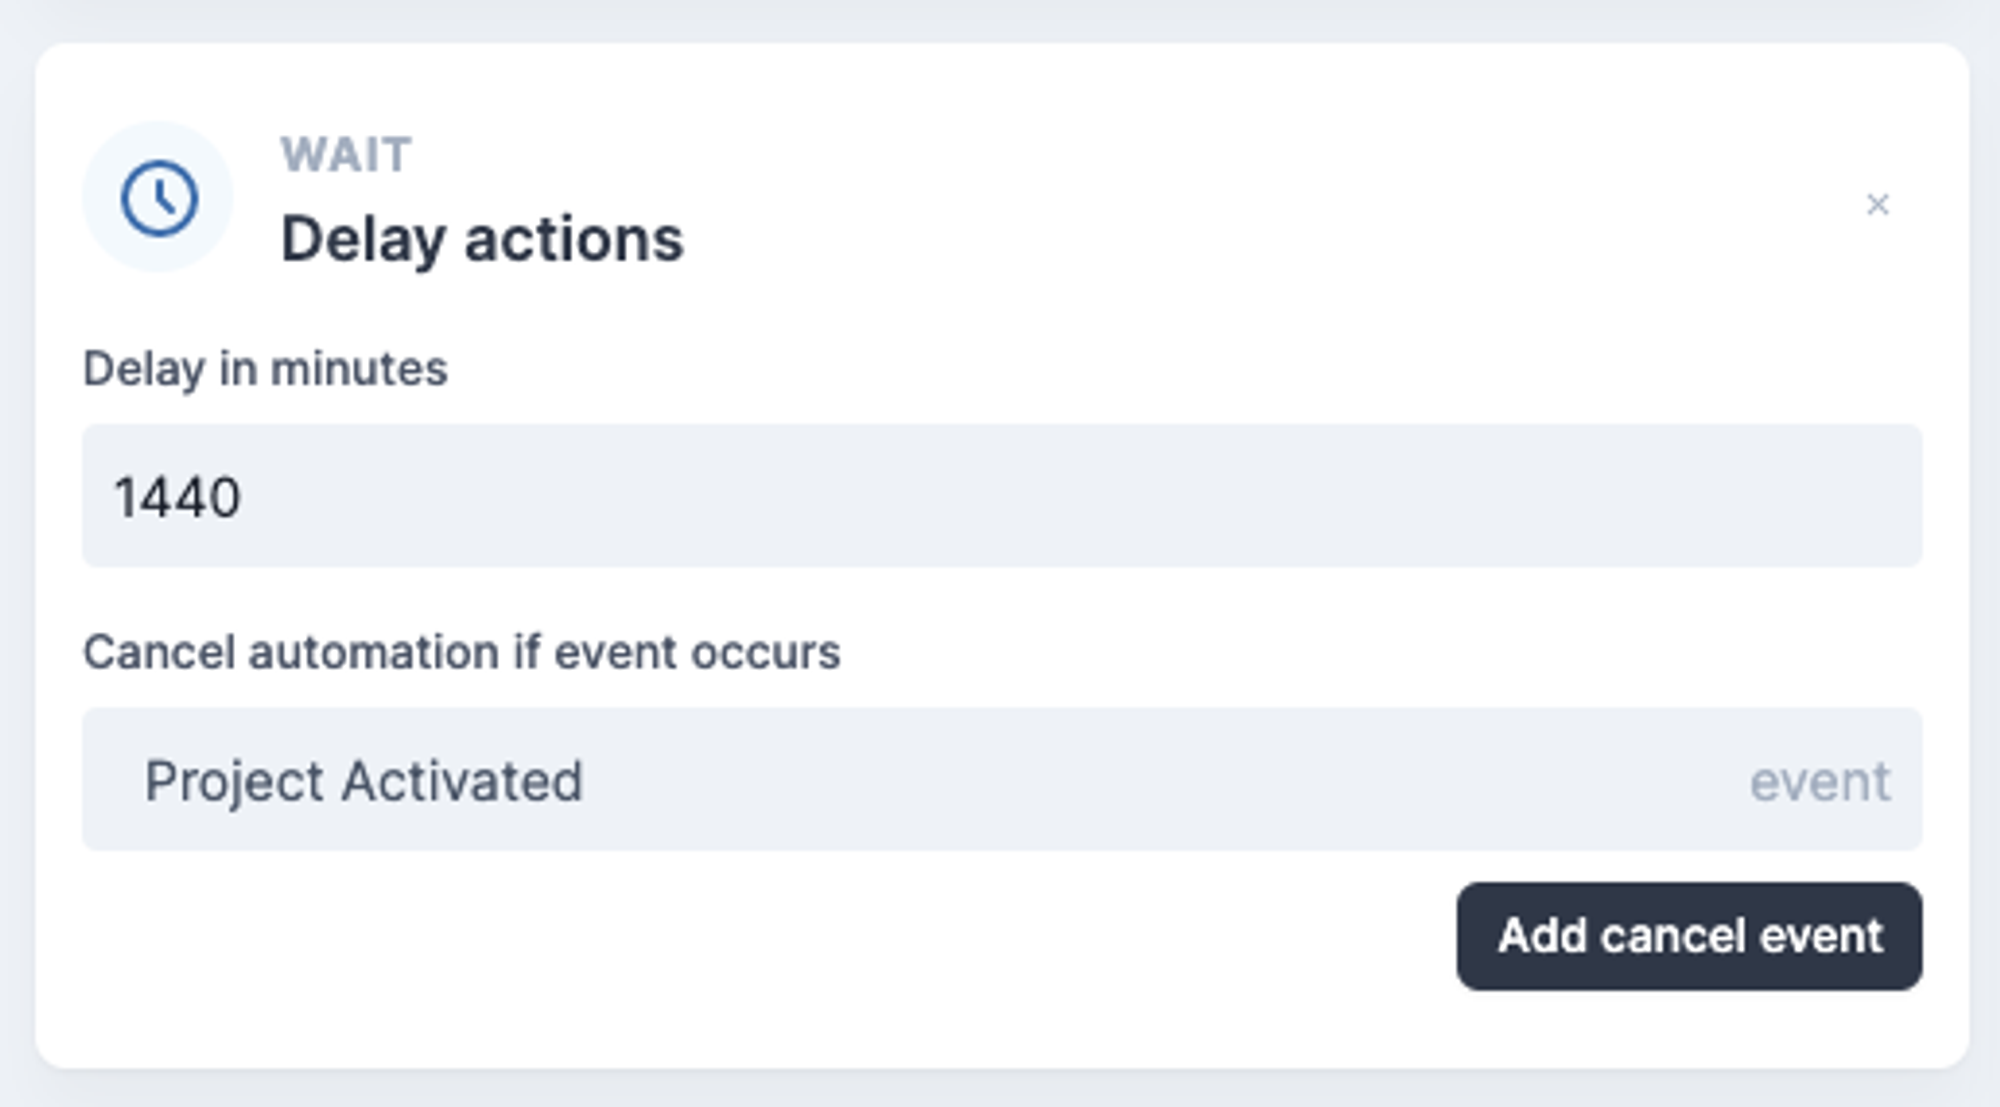
For our reactivation mail, we just want to send it when the user doesn't trigger the action Project Activated within 24 hours.
For this to happen we need to add to add a Delay and a Cancel Event.
- Our E-Mail action will now be sent after 24 hours (1440 minutes).
- Our Email action will be canceled when the user triggers the event Project Activated within that timeframe.
